Showing posts with label Wares. Show all posts

Friday, August 18, 2017

Why I Keep Failing at Blogging

Greenhill Winery
I will always wine, but never whine about being busy.

A quick scroll through the recent posts of W&W will show a very sporadic posting schedule, with large gaps between updates. Each time my blog efforts lapsed, I'd try and bounce back with a personal post explaining why I’ve been MIA or how I planned to get back into the blogging groove.

Despite my most organized efforts and flawless content calendar, each time of getting back on the wagon it would only be a few months before I’d fall off again.

I’d beat myself up mentally, being frustrated with the fact that I couldn’t stick to a schedule. I’d read so many blogging resources, like the WWW e-book blogging guide (which is fabulous BTW), yet couldn’t master my own content schedule.

It wasn’t until recently reading this blog post from Zanita Studio that it hit me as to why I constantly failed:

I was trying to do too much.


I had an amazing content calendar with themes and ideas for posts for 6 days of the week. No wonder I couldn’t keep up! What was I thinking?

As the Zanita Studio post brilliantly points out:

“Now, if you’re just starting out, that’s a lot of content. I don’t even post 5 days a week and I’ve been blogging for 7 years now. You probably don’t want to start out with guns blazing until you have a solid, loyal following who actually care what you have to say, otherwise you’ll be creating all this content for no one.”

As someone who works a full-time job, recently took on a second job on the weekends, and trying to make a blog work (like so many bloggers!); trying to do too much is kind of the theme of my life.

With that said, I love this blog and have so much fun working on it and I’m not willing to give it up. What I am willing to do is less. I commit to posting regularly, but less frequently (i.e. starting out with just once a week instead of almost daily), and will not mentally beat myself up if/when I don’t get to them. My new focus is trying to take on less in life and only give energy to the things that really, truly make me happy.


My new mantra: get shit done by doing less.

Drinking champagne
I'll drink to that! Celebrating my new life mantra.


Thursday, March 3, 2016

[Recipe] Sweet & Salty Breakfast Parfait

Breakfast Parfait

I'm not a morning person but I love breakfast food, it's my favorite meal of the day. During the weekday rush my breakfast needs to be a "grab and go" meal, which means I likely need to prepare it in advance (a.k.a the night before). Also, planning and preparing my meals in advance ensures I'll make a good food decision that will keep my energy high all morning instead of sugar crashing on something less healthy. I've been trying out a couple of new recipes lately and had a lot of leftover ingredients in my pantry, which I would normally just find a way to incorporate them into a breakfast smoothie. However, I recently changed up my breakfast game to include parfaits and I think I've found the perfect sweet and salty breakfast combo.

Here's the scoop on my new go-to breakfast:

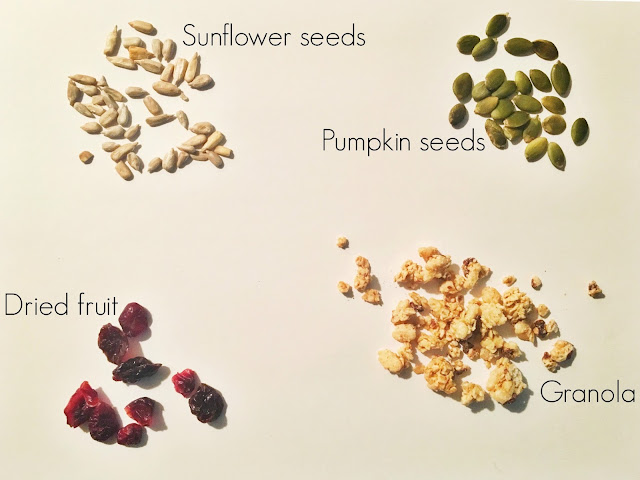
2 Tbs of granola [I like Open Nature's Chocolate Hazelnut Heaven]
1/2 Tbs of pumpkin seeds [raw, unsalted]
1/2 Tbs of sunflower seeds [raw, unsalted]
1 Tb of dried fruit [dried cherries & berries featured here]
1/2 c of yogurt [I like Fage Total 0 Greek Yogurt]

Also, if you are really into prepping your meals in advance I recommend putting all the dry ingredients into a snack-size bag and the yogurt into one of these little containers. This parfait is the perfect blend of sweet and salt which also makes it an awesome snack to have on hand when mid-day sugar craving kicks in. Bon Appetit!

Friday, January 22, 2016

[RECIPE] Simple Date Night Dinner

tomato, basil, ricotta pasta

Maybe it's the cold weather, maybe it's my need to decompress after a long week, but lately on Friday nights instead of going out after work I've been coming home and unwinding with a nice homemade meal and glass of wine. Usually, the weekend includes the coveted date night out and the opportunity to try some new restaurants in town. But I've been so drawn to the relaxing comfort of home that date night has started to take place in our apartment instead of a newly opened bodega or corner cafe. 

While on the hunt for a perfect date night dinner, I came across this New York Times recipe for a pasta with fresh mint, cherry tomatoes and pancetta. It looked amazing but felt too much like a fresh, summer dish than a warm and hearty winter recipe. So, I swapped out the mint for basil and voila! The most easy, delicious date night dish was created.

This dish can be prepared in a million ways, using whatever you have on hand or to your dietary needs. The original NYT recipe calls for fusilli pasta, but I had whole wheat shells on hand and used that instead. Also, the NYT version says the ricotta is optional, but I would NOT leave it out. It melts instantly on top of the warm dish and makes it so creamy while the scallions provide a nice crisp bite to finish.

Head over to the link above for a full list of ingredients and a great video on how to prepare. I promise you will love this simple and quick recipe.

What else are you cooking at home? Let me know in the comments below!

Thursday, June 11, 2015

A Gallery Wall for Renters

Check out any Pinterest home board and chances are, a gallery wall photo (or 5) will be pinned to it. I love a good gallery wall. I think it's a great way to tell your story and showcase your taste through personal photos, prints and art. But, if you don't own your home (like me), these can be tough to execute as it requires drilling or nailing multiple holes in your wall.

I bring you: the gallery wall for renters. While it still requires some drilling - putting the shelf into the wall - it has a lot less holes than if you were to hang each photo individually. Plus, I love that I can rearrange the order of these photos or the images within them to give my room a whole new look and feel whenever I want.

All you need is a collection of frames, a picture ledge (I used the IKEA Ribba, which I've talked about before here), and a series of prints and pictures. Many of the images on my gallery wall feature some of my travel photos that I've had printed off using an online printing service or at the local convenience store. 

Picture frames can get expensive fast, so whenever I see a frame that I like, I purchase it to avoid having to buy 10-20 frames at once to create a gallery wall. I've gathered the frames pictured below over the past couple of years from places like IKEA, Home Goods, Marshalls or TJ Maxx. I have a habit of picking up cheap frames and good candles wherever I go because I know in my house they will always get put to use!


Gallery Wall

Gallery Wall

Gallery Wall

Gallery Wall

Shelves, Lady Prints, Gold Frames: Ikea// Comparison is the thief of Joy: Schoolhouse Electric & Supply Co.// Photos from Barcelona, Berlin, DC

Tuesday, April 28, 2015

Trend Spotlight: Metallics

Trend Spotlight: Metallics


Updating your home decor can get expensive fast, but switching it up from season to season doesn't have to be. I love changing out home accents and rearranging my items to get a new look when I'm feeling a refresh. One of my favorite home decor fixes: metallics. I treat them like neutrals and love the luxe feel they add to any space. From switching out your hardware and light bulbs to adding a planter and a pillow, above are five ways you can spruce up your home with metallics for under $30. 

Wednesday, April 22, 2015

IKEA RIBBA REWORK

I hate bare walls in the home, but adding artwork can quickly become an expensive endeavour. Whether you are buying a custom piece or looking to have an inexpensive print framed, it can be challenging to decorate on a budget. One of my favorite ways to add character to a home is by featuring travel photos throughout the house.

The IKEA RIBBA frame series is perfect for my personal taste: simple, black frames with white matting included at a very reasonable price. One problem: like most IKEA items, they come in "unique" mat sizes that tend to only fit their prints. The solution: rework the frame by adding an additional mat.

Read below for 3 steps to reworking an IKEA RIBBA frame to make it look like custom piece.


Step 1: I have a standard 8x10 photo of Chicago that I took and edited on my iPhone using the Camera+ app, and had printed using a photo service, but you could also have it printed at a local convenience store. I took the frame measurements to a local framing store and selected my mat. If you are looking to add a pop of color in your house, the accent mat is a great way to do it. I stuck with a basic gray that matched the color of the photo.


Step 2: measure and line up the photo with the mats. I kept costs down with this piece by having the photo "floating." What this means is that you just lay the photo on top and tape it down, instead of having the mat cut to fit. If you are not new to framing, some shops will actually allow you to cut your own mat, which can also help keep costs down. But you also have the option to have them cut the additional mat to make the piece truly more custom. 


Step 3: Voila! I eliminated the awkward space from the photo by adding the mat and created a beautiful picture that looks custom to the space for less than $26.

Totals:
$2.99 print
$9.99 frame
$15.99 mat

Wednesday, April 15, 2015

Lilly x Target: WARES

In case you missed Monday's post, this week on W&W we are talking the Lilly Pulitzer collection for Target that launches this Sunday, April 19. While Monday was all about fashion, today we are talking home decor. Below are some of my favorite pieces that are dying to outfit a summer soiree. And that ice bucket below? Someone please get it a bottle of rose stat.

Lilly Pulitzer Gold Wine Topper and Corkscrew
Gold Plated Wine Toppers with Corkscrew - Set of 4 - $20.00

Lilly Pulitzer Napkins
Napkins with Pom Pom Trim - Set of 4 - $10.00

Lilly Pulitzer Gold Glass Hurricane Candle Holder
Gold Glass Hurricane Candle Holder - $15.00

Lilly Pulitzer Ice Bucket
Glass ice bucket - $30.00

Lilly Pulitzer Pineapple Serving Bowl
Porcelain Pineapple Serving Bowl - $30.00

Lilly Pulitzer White and Gold Outdoor Blanket
White & Gold Outdoor Blanket - $30.00
Planning on shopping the collection this weekend? Let me know what you'll be buying in the comments below!

Monday, November 17, 2014

Holiday Hostess Gift Guide

Holiday Hostess Gift Guide


With holiday season in full swing our social calendars are quickly filling up with brunches, cocktail hours and parties. I've compiled a round up of my favorite holiday hostess gifts for every event and friend - all for under $25. Chic gift giving at a reasonable price - what could be better than that? 

Merry, merry!

XO

Friday, November 14, 2014

Friday Five: 11.14.14 - Thanksgiving Recipe Edition


Happy Friday, all! Thanksgiving is my absolute favorite holiday. I love everything about it; from the magic that is the Macy's Thanksgiving Day parade, to sharing a great meal with family and friends and reflecting on what we are most thankful for; everything about the holiday just feels right to me. And, believe it or not, it's is less than 2 weeks away! To help you plan your menus, I'm sharing five of my favorite Thanksgiving Day recipes. 

Enjoy the photos above from my 2013 Thanksgiving where my sister and I cooked up a storm for 20 of our closet family and friends. Links and details to the recipes can be found below. Don't see your favorite dish or recipe listed? Share your favorites in the comments below!

1. Tyler Florence's Cranberry Orange Sauce: I love this recipe because it is so simple to make, requires so few ingredients and is so much better than anything you can find out of a can. 
2. Butternut squash soup: this recipe is a little more labor intensive in terms of time, but it totally worth it. I love starting off a Thanksgiving meal with a small cup of soup and this one does just the trick.
3. Pecan Pie: my family never skipped on the desserts at the holidays. We always had a few types of pies and desserts to go around, but my favorite was always my Nana's pecan pie. The night before Thanksgiving we would all gather at her house every year and start the baking process where I would watch her hand lay every single pecan in a design for the Thanksgiving pie every year. Seeing her attention to detail made it that much more special.
4. Stuffing: for me, a Thanksgiving table isn't complete without stuffing. Hands down, it's one of my favorite dishes of the meal and certainly one of my favorite leftovers to nosh on later that night. However, I realize it's not a dish for everyone. Martha Stewart has a great index of 20 unique stuffing recipes that can find their way onto any Thanksgiving table.
5. Sweet Potato Casserole: I love sweet potatoes and thank the popularity of the paleo diet for putting them back on the map. While this recipe isn't necessarily paleo-approved, it is certainly delicious.

P.S. don't forget the most important Thanksgiving cooking aid of all... a mimosa :)

Bon Appetit!

XO

Monday, July 21, 2014

Fashion Meets Technoloy


Happy Monday, all! More often than not lately, I am turning to my iPhone for my fashion inspiration. Apps like Lookbook.nu allow me to see some of the radest street style looks out there, while apps like Pose and Polyvore allow me to shop all the latest looks. And maybe the most fun app of all: Plum Perfect - which allows you to take a picture of your face to match makeup to your skin color based on your desired looks (natural v. glam, etc.) I spent a good 30-45 minutes in Sephora tracking down all the products I saved on Plum Perfect - and also managed to find my new signature lip color.

Links for apps and websites from L to R: Pose // Lookbook.nu // Polyvore // Plum Perfect

Any fashion apps that you use not mentioned in the post? Leave them in the comments below!

xx


Wednesday, June 18, 2014

Reverse IKEA Hack

Happy Wednesday, all! This past weekend my sister and I took on some major DIY/home reno projects at her place. One of our favorite final pieces was this chest of drawers below. The piece was a gorgeous oak with minimal finish, but didn't fit the rest of the furniture in the room, which was all IKEA in the brown black color.  So, with a can of paint and some tools we took the following steps below to make it match. To take on this project you'll need the following materials:

- Plastic paint tarp
- Paint Trays, brushes, and and old t-shirts
- Putty knife
- Strypeeze paint remover
- Paint thinner
- Medium grit sand paper (100-220) and hand scrubber
- Quart of interior paint and primer (we used Benjamin Moore interior paint and primer in Taupe)


Step 1: We prepped our outside space with a paint tarp, and removed the drawers from the base and began the process to strip it from its current finish. We placed some of the Strypeeze in the pant tray and brushed it on the drawers and base, letting it set for 15-20 minutes. Note: I worked all weekend in my Kate Spade Keds. Who said Kate Spade can't go with home renovations? :)


Step 2: After the time was up we took a putty knife to begin peeling away the current finish. Be sure to press very lightly with the putty knife as to not damage the wood. After the finish had been removed we began hand sanding with squares of 100 grit sandpaper. This is the most laborious part of the process and the most critical step. The key to making sure that the refinished piece looks nice is making sure all of the old finish gets removed.


Step 3: After sanding is complete take your hand scrubber and can of paint thinner and apply it to all the sanded areas. I just pour a bit on the wood and used the hand scrubber to buff it out. Once the wood has been buffed take one of your old t-shirts and wipe off any remaining debris left from sanding and wipe down. Let dry completely before beginning the painting process.


Step 4: Next is the fun part - time to paint! For this specific project I choose paint over wood stain. Wood stain can be tricky to work with and you really have to sand down the piece to ensure the stain sticks. Since I am still a novice at these projects, I did not think I was ready to to take on the wood stain. For this project the goal was to have the furniture match the color of existing IKEA furniture in the room. We chose Benjamin Moore's interior paint and primer in Taupe. Picking a paint with a build in primer also helped eliminate a step.


Step 5:  To begin the painting process I poured some paint into a tray and took an old t-shirt (the softer, the better) and dipped it in the paint to apply the coat. The lighter and less paint you use the better. The goal is to really build up to the color you desire by applying light layers and letting them dry in between coats before applying another.

To finish the piece I took an angled paint brush and and some artist paint brushes to touch up the small crevices, and voila! Piece complete. Wait until piece is completely dry before reassembling the furniture. 

And there you have it, a 5 step process for refinishing a piece of wood furniture. Questions? Ask away in the comments below!


Wednesday, April 16, 2014

Black & White


Happy Wednesday, all! Hope everyone is having a great week. This post offers a sneak peak of my orange family room. Like what you see? Stay tuned for a special Wares & Wears at home post in the coming weeks!

Tuxedo Blazer: Zara// Ankle Pants: Gap// Stilettos: Zara// Shades: LOFT// Lips: L'Oreal Infallible 399// Nails: Essie Master Plan
 

design + development by fabulous k